dietz4ibanez
Admin
This "How to" guide was provided to us by permission from Mblouir(Matt-a member of a truck forum I am on)... Thanks Matt!
I've been wanting to make a camera mount for a while, now. I've also had people asking me for more exhaust videos, so I decided to kill two birds with one stone.
Note: I found this design method online, so I am not taking credit for it at all. Just passing it along...
Materials:
- Piece of material (stock aluminum, steel, wood, whatever) approximately 18" long
- (2) 1/4"x20 U-bolts
- (2) Small plates that usually come with U-bolts
- (4) 1/4"x20 nuts
- (2) 1/4"x20 bolt (length variable)
- Washers (if necessary)
- Some type of camera mount (I am using my tripod mount. Reason this is suggested is to prevent you threading a bolt too far into the camera. Trust me, it's not a pleasant sound when you thread through the body and into the lens. RIP, old point-and-shoot.)
Total Cost: About $10 if purchasing everything new.
Tools:
- Some type of saw (hacksaw, bandsaw, etc) if you need to cut the stock material
- Drill
- Drill bit (I used 9/32")
- Wrench to tighten nuts
Steps:
Pictures should be self-explanatory, but I'll throw these in for good measure.
- Put your material up next to the headrest bars in your vehicle (mounting location). Use a marker to spot where the U-bolts should go. This should be simple enough. Also make a small mark on top of the material where you want the camera/camcorder to be located.
- If necessary, cut the material to desired length. Drill your holes and test-fit the U-bolts to make sure they go through smoothly.
- If everything fits well, take it out to your vehicle and install it. I started out with it in the backseat. Ended up moving it to the front seat since my test runs were at night. Easier to get an idea of what's where while watching.
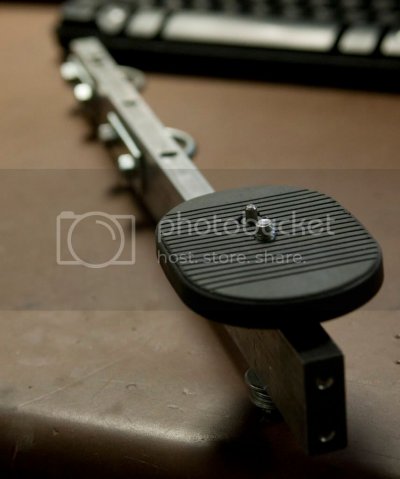
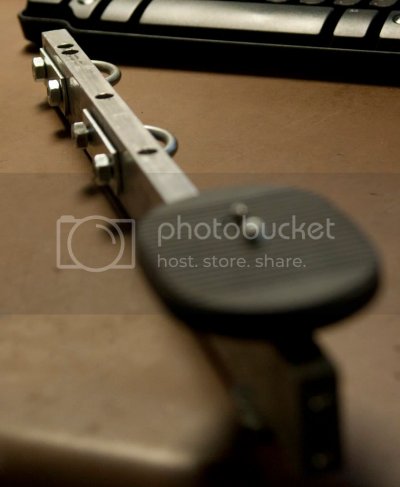
Camera Mount Assembled:


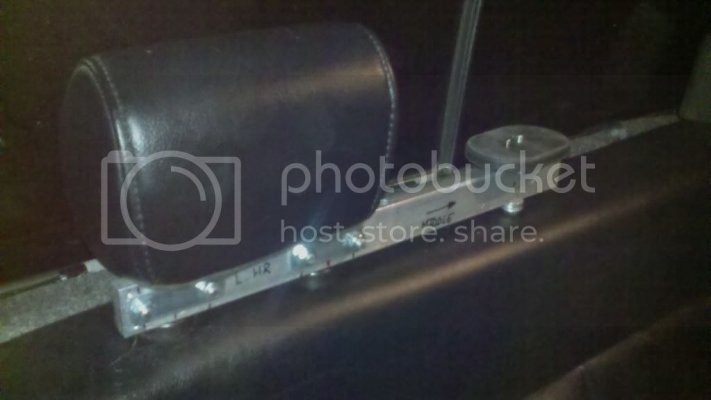
Camera Mount Installed:
This is in the back seat---like I mentioned, I moved it to the front seat. Sorry for the poor quality on this one.

Video Tests:
Note: These are long videos, but you get a good idea of just how sturdy this thing is. I hit some pretty rough spots in the road and it pretty much just bounced with the truck. No excessive wobbling at all. I'm very impressed with the durability.
Will post daylight videos in the morning. With it being night, the camera chose to expose the video based on the radio, so everything else is underexposed.
Daylight Video 1: To the Dog Park
Got tired of waiting on the second video to upload, so here's the first.
I've been wanting to make a camera mount for a while, now. I've also had people asking me for more exhaust videos, so I decided to kill two birds with one stone.
Note: I found this design method online, so I am not taking credit for it at all. Just passing it along...
Materials:
- Piece of material (stock aluminum, steel, wood, whatever) approximately 18" long
- (2) 1/4"x20 U-bolts
- (2) Small plates that usually come with U-bolts
- (4) 1/4"x20 nuts
- (2) 1/4"x20 bolt (length variable)
- Washers (if necessary)
- Some type of camera mount (I am using my tripod mount. Reason this is suggested is to prevent you threading a bolt too far into the camera. Trust me, it's not a pleasant sound when you thread through the body and into the lens. RIP, old point-and-shoot.)
Total Cost: About $10 if purchasing everything new.
Tools:
- Some type of saw (hacksaw, bandsaw, etc) if you need to cut the stock material
- Drill
- Drill bit (I used 9/32")
- Wrench to tighten nuts
Steps:
Pictures should be self-explanatory, but I'll throw these in for good measure.
- Put your material up next to the headrest bars in your vehicle (mounting location). Use a marker to spot where the U-bolts should go. This should be simple enough. Also make a small mark on top of the material where you want the camera/camcorder to be located.
- If necessary, cut the material to desired length. Drill your holes and test-fit the U-bolts to make sure they go through smoothly.
- If everything fits well, take it out to your vehicle and install it. I started out with it in the backseat. Ended up moving it to the front seat since my test runs were at night. Easier to get an idea of what's where while watching.
Camera Mount Assembled:


Camera Mount Installed:
This is in the back seat---like I mentioned, I moved it to the front seat. Sorry for the poor quality on this one.

Video Tests:
Note: These are long videos, but you get a good idea of just how sturdy this thing is. I hit some pretty rough spots in the road and it pretty much just bounced with the truck. No excessive wobbling at all. I'm very impressed with the durability.
Will post daylight videos in the morning. With it being night, the camera chose to expose the video based on the radio, so everything else is underexposed.
Daylight Video 1: To the Dog Park
Got tired of waiting on the second video to upload, so here's the first.
